obdtool another blog
obdtool in ukobdtool another blog
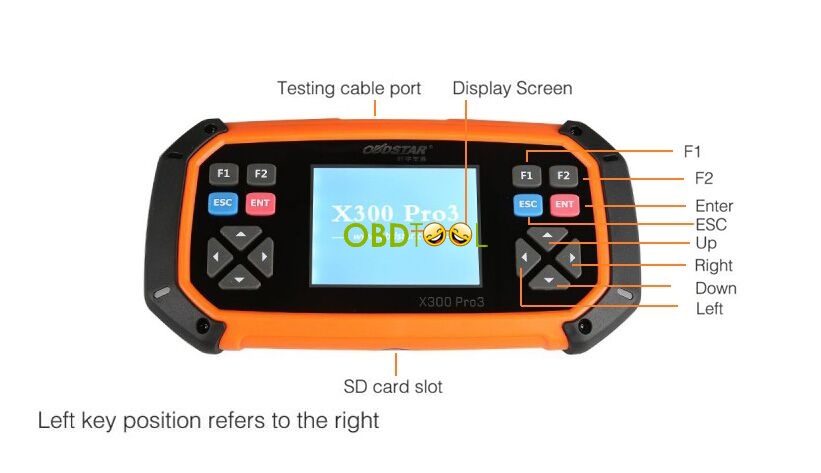
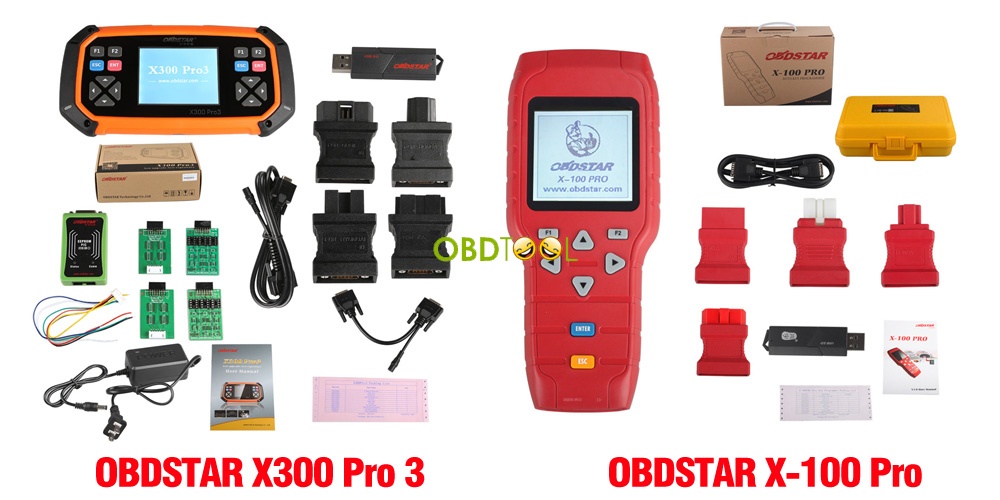
obdtool in ukOBDSTAR X300 PRO3 Key Master VS SKP900 And X100 Pro
OBDSTAR X300 PRO3 Key Master compare with SKP900 Key Programmer:
OBDSTAR X300 PRO 3:
SKP-900 KEY PROGRAMMER:

1 New design based on industrial standard, Quick down load speed, Lateral keyboard, Bigger screen
2 More cars can be supported to adjust odometer by Key Master than SKP-900
3 More ECU matching function deployed with, for example, to replace HONDA ECM
4 More qualified and stable, and rarely occurs communication failed, For example, matching proximity of HYUNDAI KIA
5 the most coverage of Chinese cars.
6 Optional choice offered, such as OIL/SERVICE and EPB
7.Support the latest version of Mazda CX-3,CX-5,Mazda 2/3/6 and no need Pin code anymore.
OBDSTAR X300 PRO3 Key Master with OBDSTAR X100 PRO
1 New design based on industrial standard, Quick down load speed, Lateral keyboard, Bigger screen
2 No pin code needed anymore to the latest cars of Ford/Mazda, for example,CX3/CX5/M2/M3/M6 etc.
3 More testable cars supported,for example,BENZ BMW etc.
4 Optional choice offered like OIL/SERVICE and EPB
5.Support the latest version of Mazda CX-3,CX-5,Mazda 2/3/6 and no need Pin code anymore.
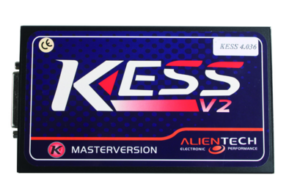
Choose KESS V2 ? K-tag ? or Fgtech Galletto V54 ?
Different among Top 3 ECU Programmer KESS V2 V2.22 firmware V4.036_Ktag V2.13 firmware V6.070_Fgtech V54 Galletto 4:
Product Name | SE87-C | SE80-C | SE61-G |
Function | read and write the Data of Engine ECU | read and write the Data of Engine ECU | read and write the Data of Engine ECU |
Support Vehicles | Cars and part Bikes | cars, trucks,traktors and bikes | Car, Truck, Motorbyke, Marine |
Support Protocols | With coverage of all major brands and protocols including Line, CAN, EDC17 and MED17 and Ford J1850 | Available Protocols for K-TAG: BDM MOTOROLA MPC5xx | NEW JTAG – BDM – MOTOROLA – FREESCALE – INFINEON |
Method | Via OBD2 | Via BDM | Both via BDM and OBD |
Update | Update via Hardware | Update via Hardware | NO |
Token | No tokens limitation | No tokens limitation | No |
Langauge | English, German, Spanish, Italian, Portuguese, French | English, German, Spanish, Italian, Portuguese, French | English, Italian, German, French, Spanish, Portuguese, Czech, Turkish |
EDC17 | work with a small part | work with a small part | work with a small part |
Additional remark | 1) Most customers use FGTech Galletto 4 V54. Some users prove fgtech2 v52 works 50% obd. BDM works ok and work ok with tricore and st10 micros. Fgtech galletto not disappoint them never. 2) KESS V2 has Anti-mediation lock module, it can do new and encrypted cars better than Fgtech. Remark: no one is perfect, maybe is good to have more than one tool, but much better is to have one good tool. | ||
Kess V2 V2.22 Firmware V4.036 Master:
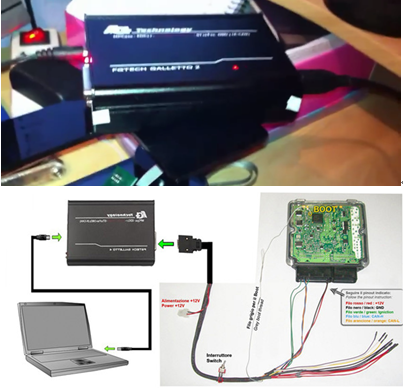
K-TAG V2.13 Firmware V6.070 Master Version:

Best Quality FGTech V54 Galletto 4 Master Version:
How to use VAS 5054A ODIS 3.0.3 for Audi A62012 diagnosis
VAS 5054A ODIS 3.0.3 test OK on Audi A62012
This is a test result of VAS 5054A ODIS 3.0.3 diagnosis on 2012 Audi a6 sedan.
diagnostics: VAS 5054A scan tool + ODIS-S v3.0.3
model: Audi A6 (c7) 2012
engine: CDNB 2.01 TFSI / 132 kw
check connection of 5054a scanner and the laptop and the car
run ODIS service
ODIS recognize the car and ignition without any problem
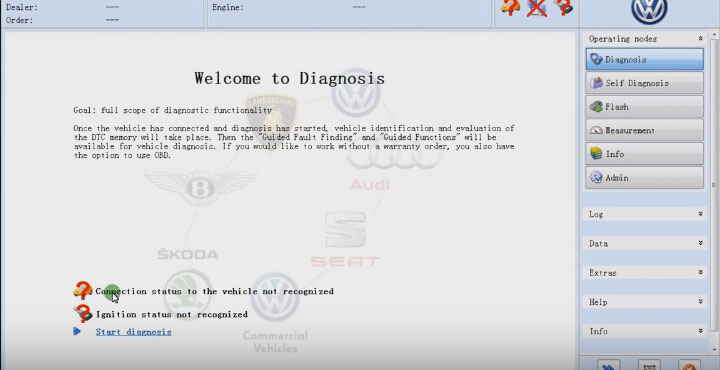
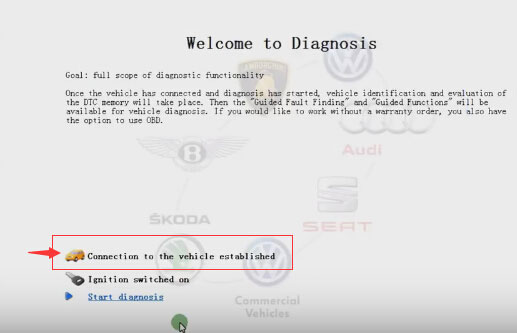
then click on Start diagnosis
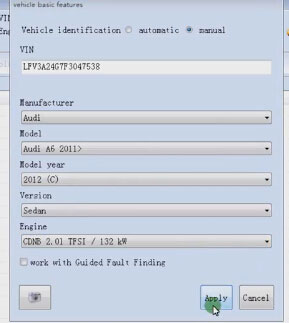
enter vehicle basic information
manufaturer: Audi
model: Audi A6 2011>
model year: 2012 (C)
version: sedan
engine: CDNB 2.01 TFSI / 132 kw
go to Network connection
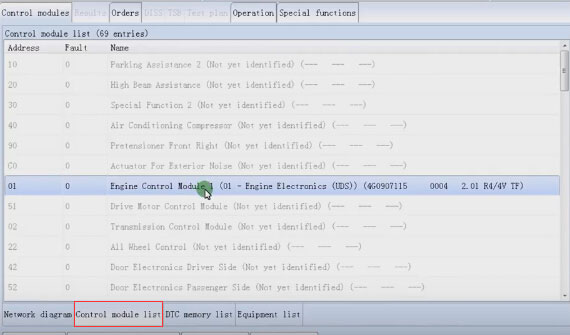
select MOT_01-> Identify control module

engine control module 1
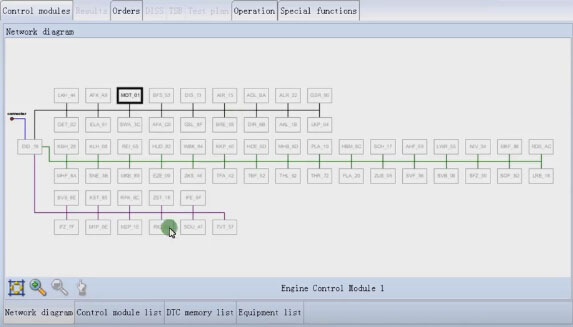
go to Control module list
UDS protocol is supported by VAS 5054A
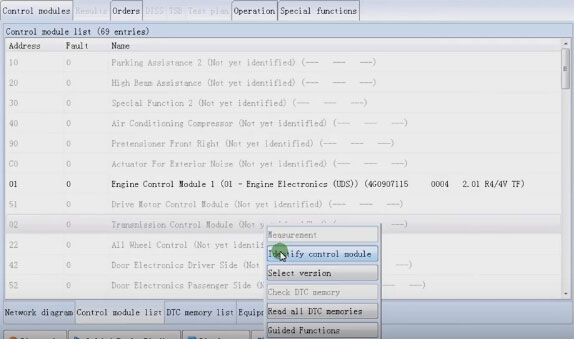
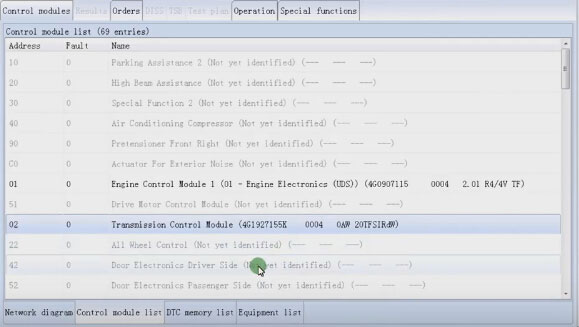
select transmission control module-> Identify control module
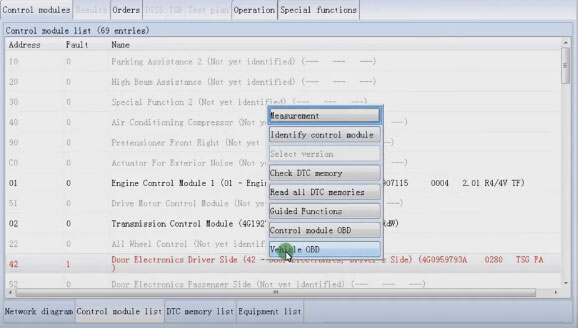
select Door electronic driver side-> Identify control module
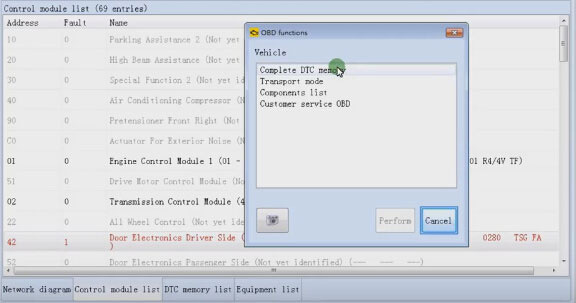
find a faulty code, then select Vehicle OBD to perform OBD functions
select Complete DTC memory
control modules with DTC entries
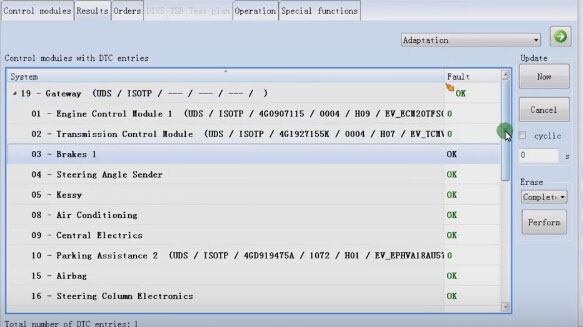


select system 42 line: Door electronic driver side
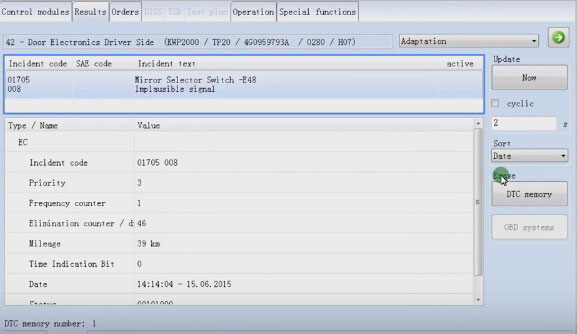
this is the incident code of the door electronic driver side
erase DTC memory
then VAS 5054A diagnosis on AUDI A6 complete.
How to use VXDIAG Cloud Diagnostics? (No need install software)
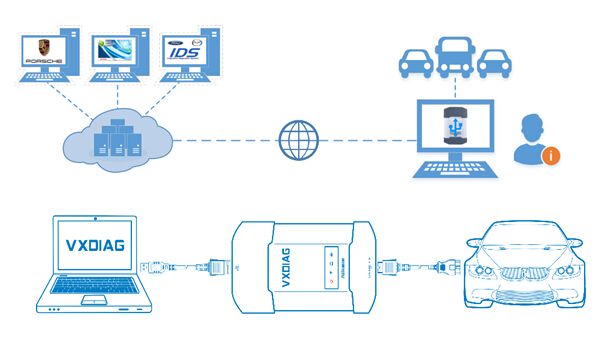
VXDIAG Cloud Diagnostics is now available to use and tested OK by eobdtool engineers! This blog will show you how to use VXDIAG Cloud Diagnostics. Just use your VXDIAG VCX NANO or VXDIAG Multidiagnostic tool. (No need install any software on PC)
Why to use VXDIAG Cloud Diagnostics?
You don’t have to install any OEM software on PC. You can login cloud diagnostic server and diagnose your car directly online after connecting interface to laptop and car. Isn’t it cool?
What you should know about VXDIAG Cloud Diagnostics?
1. VXDIAG Cloud Diagnostics can work on all VXDIAG VCX NANOinterfaces and VXDIAG Multi diagnostic tools.
2. Free download VX Manager 1.2.0.0905: (Needed for VXDIAG Cloud Diagnostics)
3. VXDIAG Cloud Diagnostics laptop requirements: Win 7, Win 8 or Win 10 OS systems (Win XP is not supported); Explorer 11 or Google chrome (For login cloud diagnostic server http://cloud.vxdiag.net)
How to use VXDIAG Cloud Diagnostics?
Part1. Set up VX Manager Driver
Part2. Login VXDIAG cloud diagnostic server and start diagnosis.
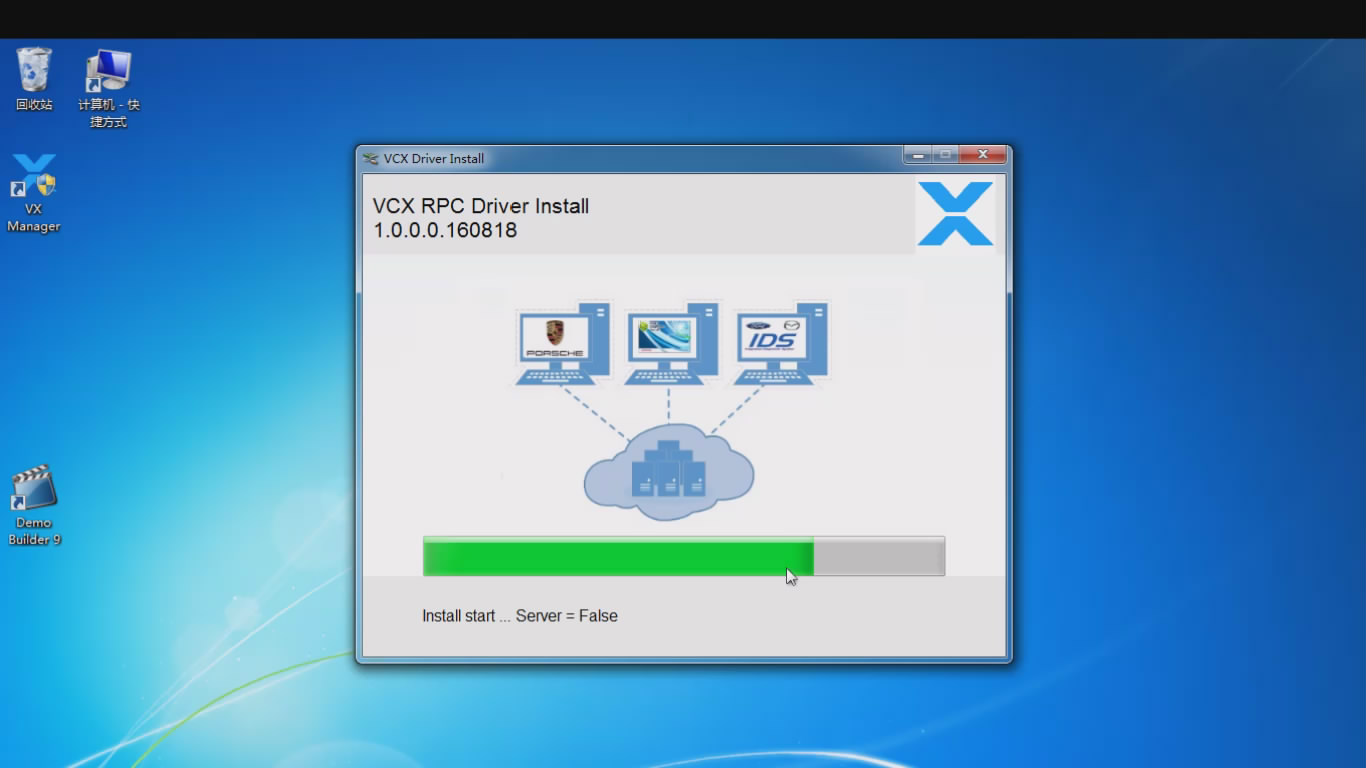
Step1. After installed VX Manager, double click the icon. It will pop up an interface, choose “I accept the agreement”, click “Next”, then “Next”. Wait for a minute it will show “VCX SDK Driver Install”, after that click “Finish”.

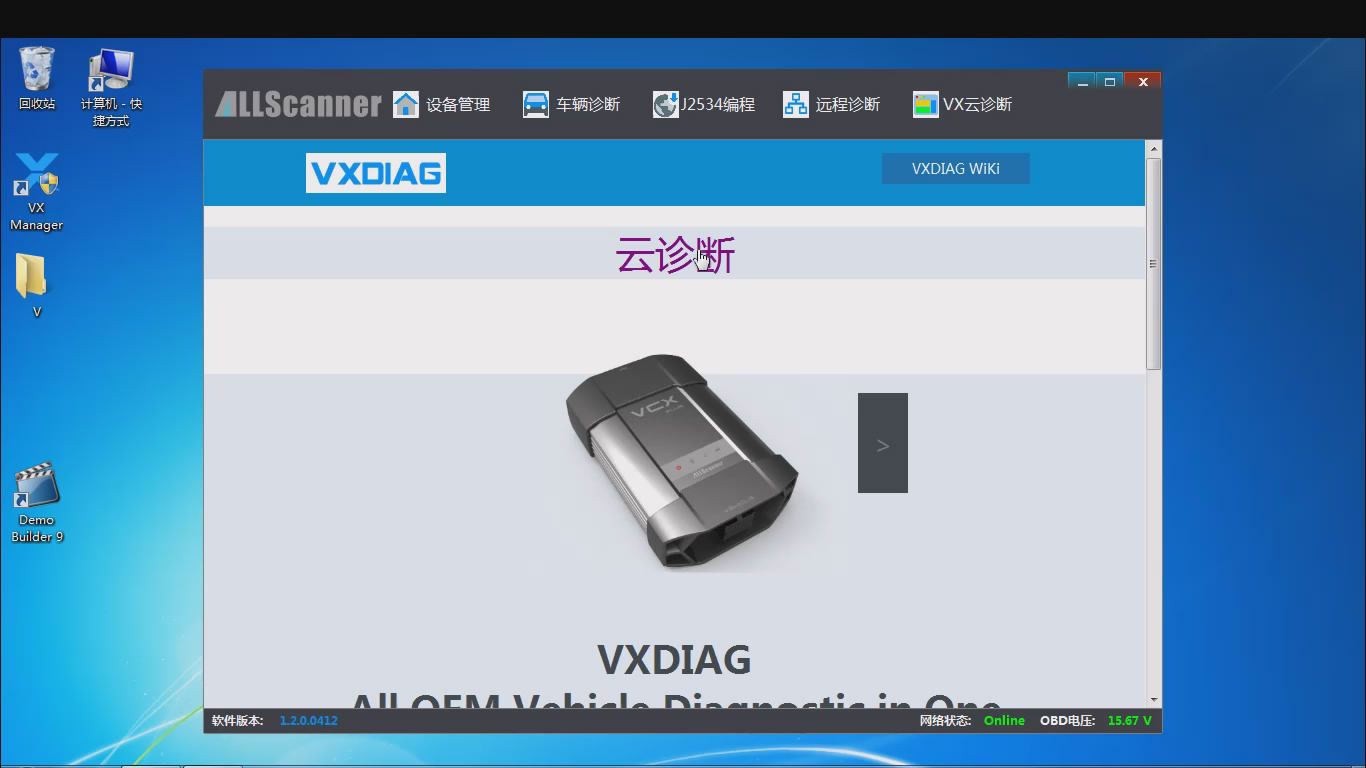
Step2. Double click the “VCX Manager” shortcut, click “Cloud Diagnostics”
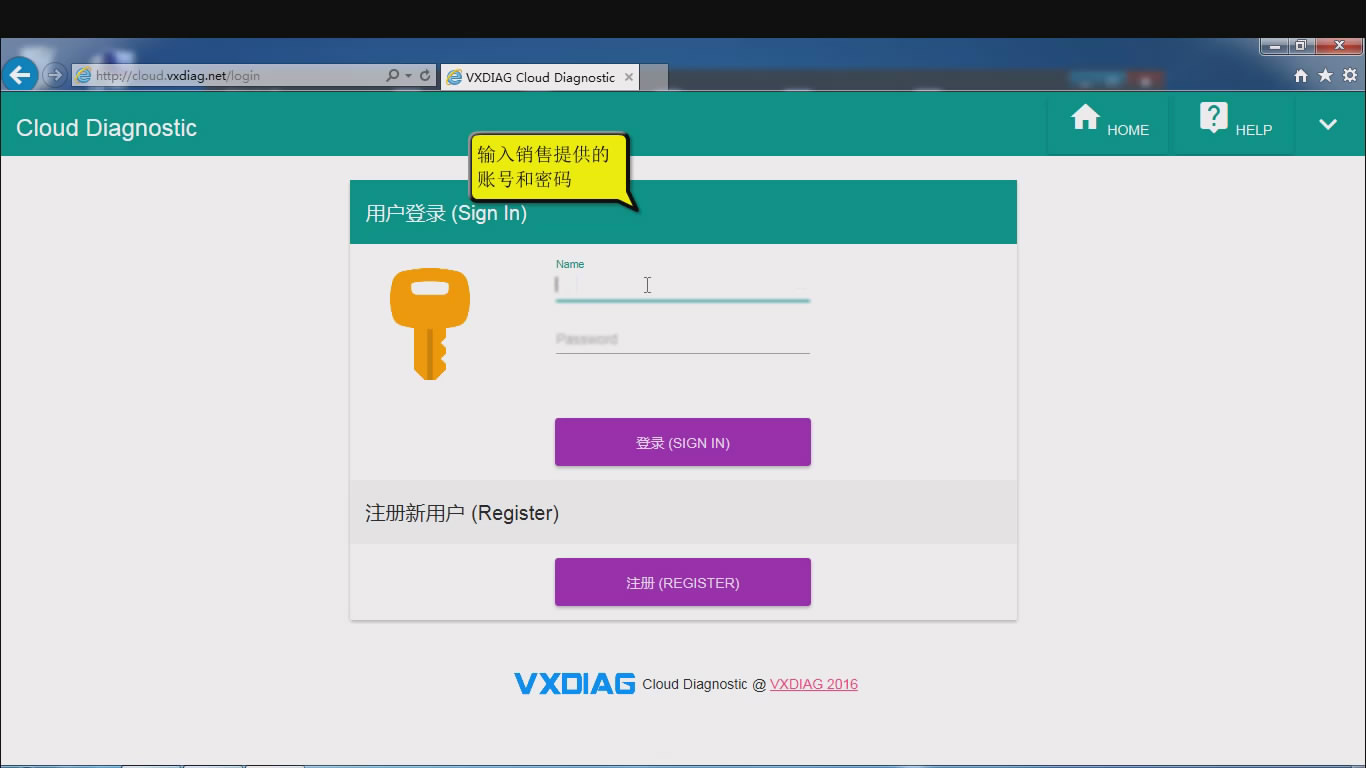
Then it will pop up a website for login. Input name and password (You can ask the sales),
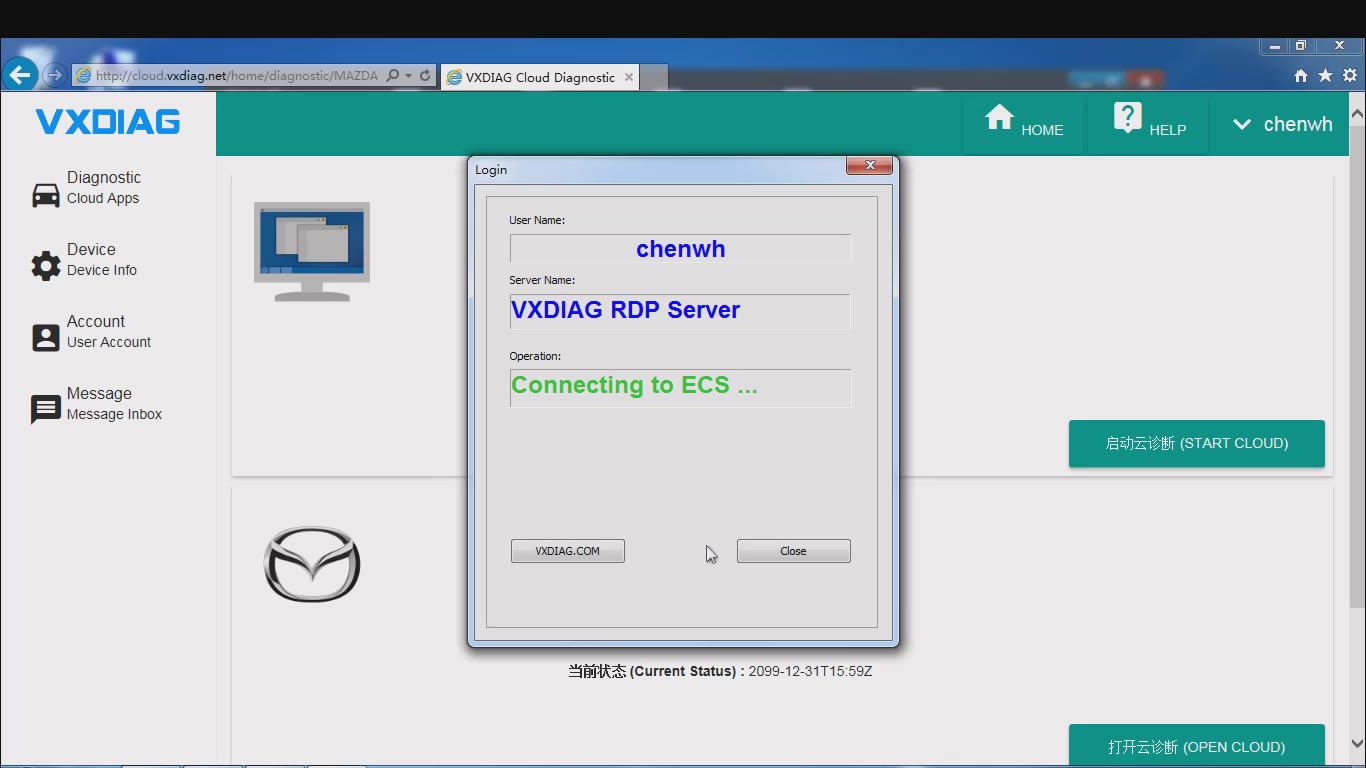
Step3. After login, you can choose whichever car brand to start cloud diagnosis.
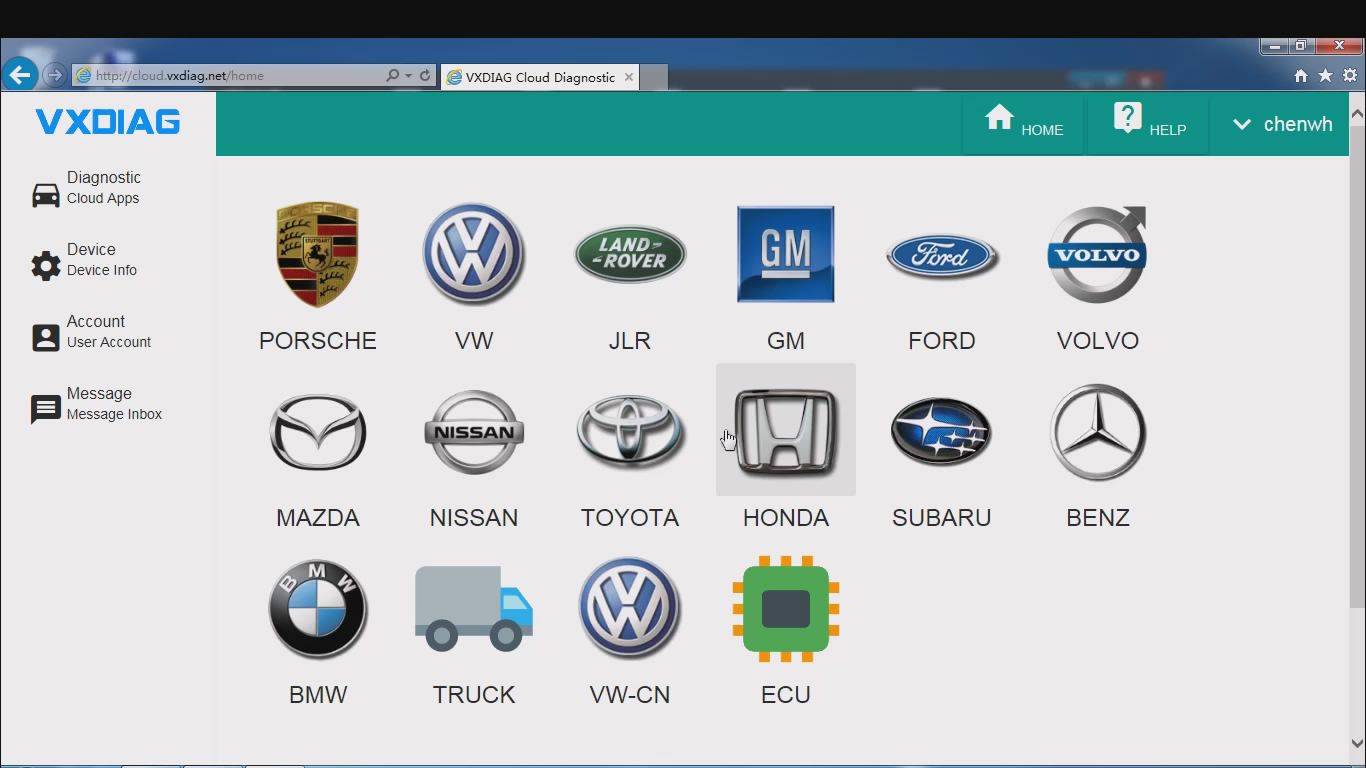
For example, choose “Mazda” and click “Open Cloud” (During diagnose process if there is any pop-up connect question please always choose “connect” and “yes”)
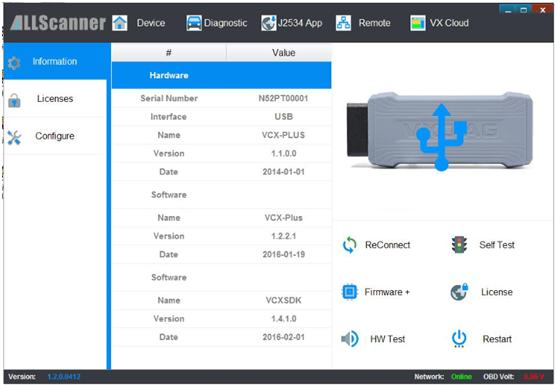
You can see the detailed information of your interface.
Step4. Double click the “Mazda IDS” icon on desktop. Choose “Open a new dialogue program” then it will show “Communicating to PCM”. After that you can start VXDIAG Cloud Diagnostics by VXDIAG VCX NANO or VXDIAG Multi diagnostic tool now!

How to use VXDIAG Cloud Diagnostics? (No need install software)
VXDIAG Cloud Diagnostics is now available to use and tested OK by eobdtool engineers! This blog will show you how to use VXDIAG Cloud Diagnostics. Just use your VXDIAG VCX NANO or VXDIAG Multidiagnostic tool. (No need install any software on PC)
Why to use VXDIAG Cloud Diagnostics?
You don’t have to install any OEM software on PC. You can login cloud diagnostic server and diagnose your car directly online after connecting interface to laptop and car. Isn’t it cool?
What you should know about VXDIAG Cloud Diagnostics?
1. VXDIAG Cloud Diagnostics can work on all VXDIAG VCX NANOinterfaces and VXDIAG Multi diagnostic tools.
2. Free download VX Manager 1.2.0.0905: (Needed for VXDIAG Cloud Diagnostics)
3. VXDIAG Cloud Diagnostics laptop requirements: Win 7, Win 8 or Win 10 OS systems (Win XP is not supported); Explorer 11 or Google chrome (For login cloud diagnostic server http://cloud.vxdiag.net)
How to use VXDIAG Cloud Diagnostics?
Part1. Set up VX Manager Driver
Part2. Login VXDIAG cloud diagnostic server and start diagnosis.
Step1. After installed VX Manager, double click the icon. It will pop up an interface, choose “I accept the agreement”, click “Next”, then “Next”. Wait for a minute it will show “VCX SDK Driver Install”, after that click “Finish”.
Step2. Double click the “VCX Manager” shortcut, click “Cloud Diagnostics”
Then it will pop up a website for login. Input name and password (You can ask the sales),
Step3. After login, you can choose whichever car brand to start cloud diagnosis.
For example, choose “Mazda” and click “Open Cloud” (During diagnose process if there is any pop-up connect question please always choose “connect” and “yes”)
You can see the detailed information of your interface.
Step4. Double click the “Mazda IDS” icon on desktop. Choose “Open a new dialogue program” then it will show “Communicating to PCM”. After that you can start VXDIAG Cloud Diagnostics by VXDIAG VCX NANO or VXDIAG Multi diagnostic tool now!